You cannot select more than 25 topics
Topics must start with a letter or number, can include dashes ('-') and can be up to 35 characters long.
14 KiB
14 KiB
vue知识分享
创建一个包含babel和eslint工程化项目
环境准备
- 安装node(自带npm,node版本14以上)
- 在任意文件夹中打开终端(便捷打开终端方式:在文件夹地址中输入cmd+ener键即可)
- 安装脚手架(vue-cli 5.0.8版本为例)
- npm i -g @vue/cli 5.0.8 (-g 全局安装)
- vue -V (查看脚手架版本,检测是否安装成功)
操作步骤
- 利用脚手架搭建项目:目前提供了两种方式,
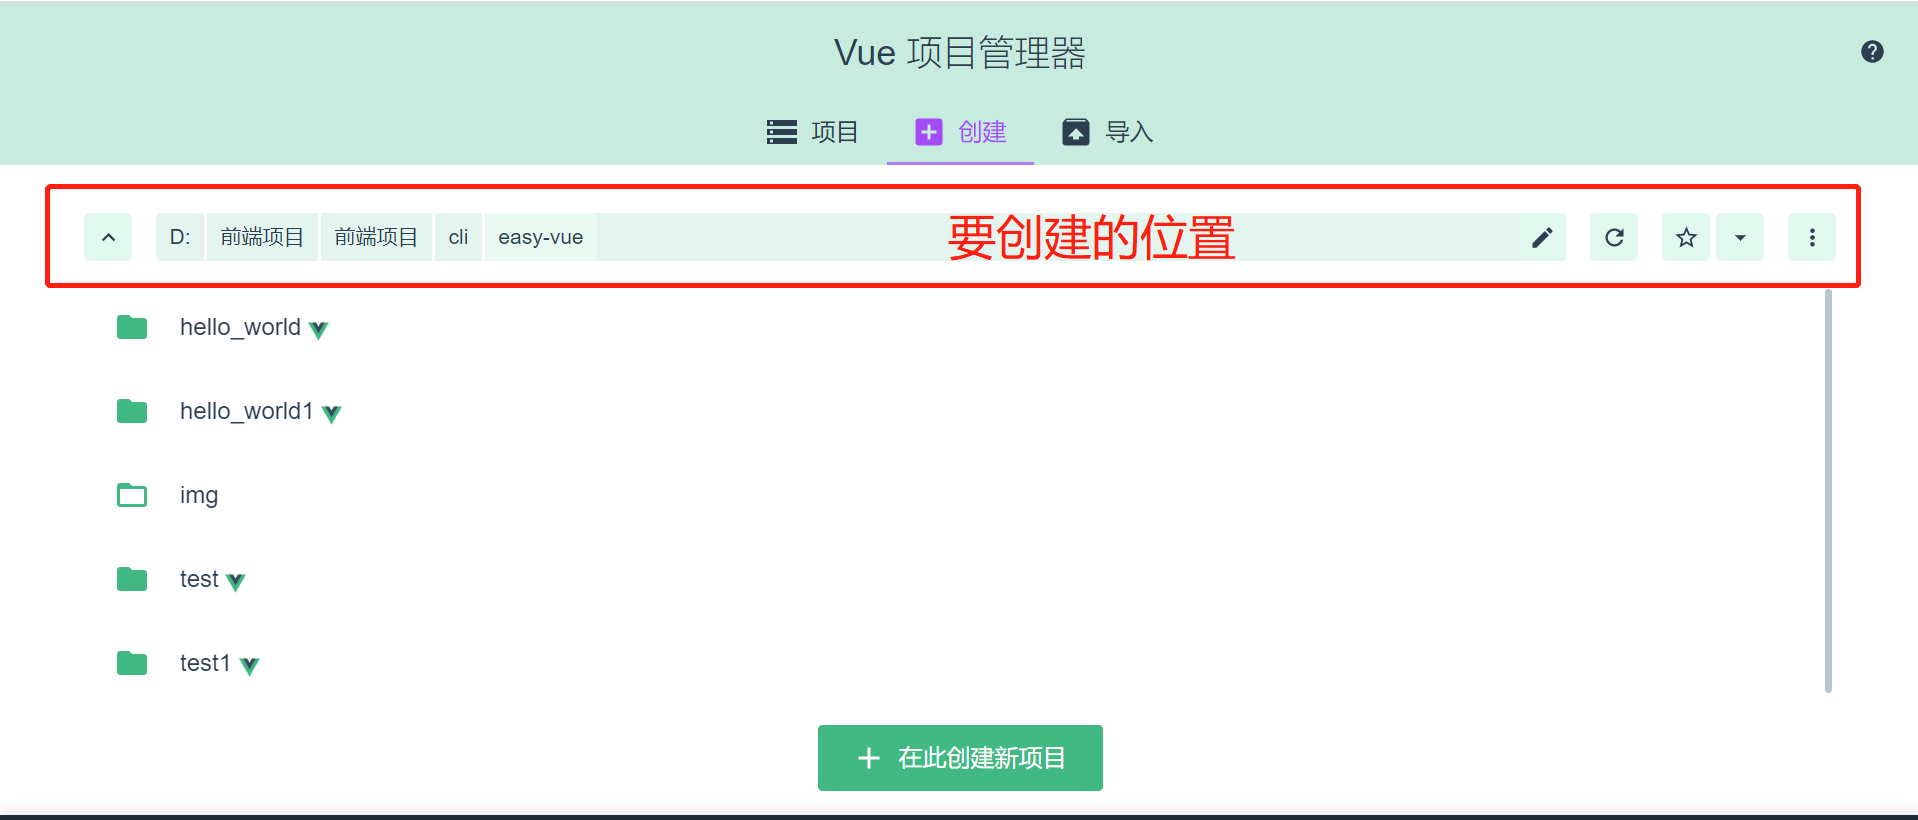
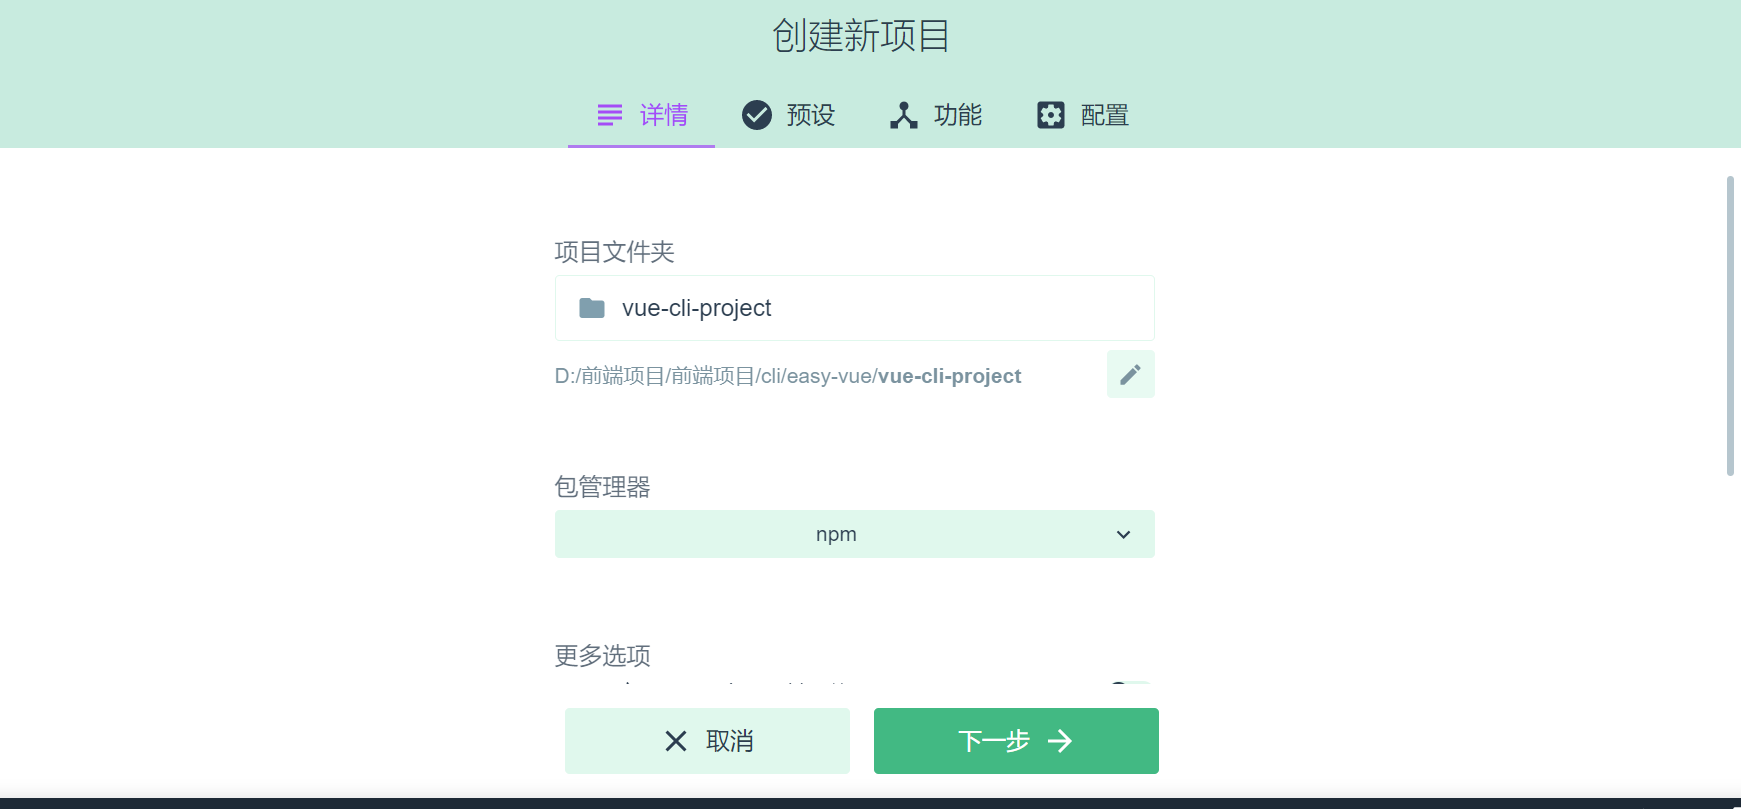
1. vue ui (界面化选配搭建)
1. 进入要搭建项目的目录打开终端输入:vue ui 将自动打开一个创建页面
2.
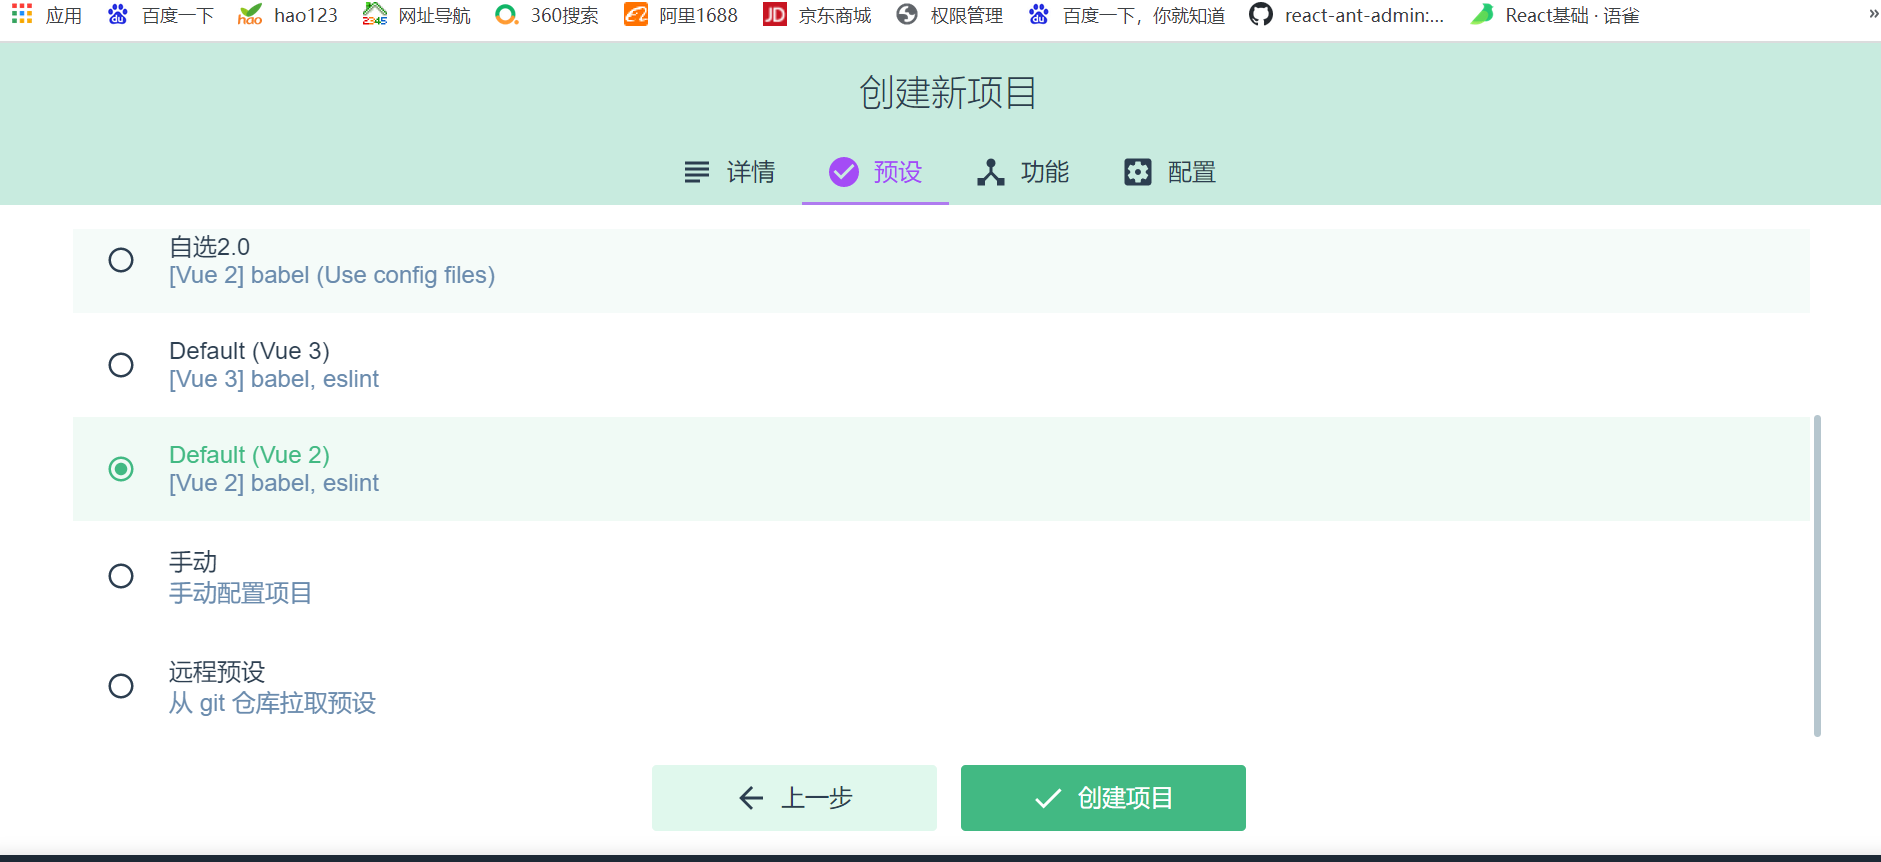
2. 使用vue create 命令方式搭建
1. 进入要搭建项目的目录打开终端输入:vue create vue-cli-project
2. 选中默认模板 Default([Vue 2] babel, eslint)
项目目录结构
|-- HELLO_WORLD                          项目名称
    |-- node_modules                     依赖文件
    |-- public                           静态资源
    |   |-- favicon.ico                  页面tab图标
    |   |-- index.html                   挂载的页面
|-- src                              主要开发的源码
        |-- App.vue                      根组件
        |-- main.js                      整个项目的入口,引入依赖包、默认页面样式等
        |-- assets                       资源文件
        |   |-- logo.png
        |-- components                   公共组件
            |-- HelloWorld.vue
    |-- .browserslistrc                  浏览器约定(可写到package.json中去)
    |-- .eslintrc.js                     eslint配置(可写到package.json中去)
    |-- .gitignore                       提交忽略文件配置
    |-- babel.config.js                  babel配置文件(使es6+向后兼容适配浏览器的js环境)
    |-- jsconfig.json                    文件提示配置
    |-- package-lock.json                版本锁定文件
    |-- package.json                     版本信息
    |-- README.md
    |-- vue.config.js                    webpack相关配置(vue.config.js: https://cli.vuejs.org/zh/config/#vue-config-js)
二:初步应用vue
vue生命周期
vue生命周期是什么?
vue生命周期是指vue对象从创建到销毁的过程。也就是vue对象从开始创建、初始化数据、编译模板、挂载Dom、渲染→更新→渲染、卸载这一系列过程。其作用是在vue生命周期的不同阶段通过对应的钩子函数来实现组件数据管理和DOM渲染两大重要功能。
生命周期钩子有那些?
1. beforeCreate(创建前)
2. created (创建后,该时间能拿到data中数据了)
3. beforeMount (载入前)
4. mounted (载入后,该时间能拿到dom元素)
5. beforeUpdate (更新前)
6. updated   (更新后)
7. beforeDestroy( 销毁前)
8. destroyed (销毁后)
生命周期钩子使用
应用场景:初次加载组件触发了beforeCreate、created、beforeMount、mounted四个钩子函数,我们可以在created函数中操作数据,在mounted中操作dom元素。
-
在App.vue中添加beforeCreate、created、beforeMount、mounted四个钩子函数。
-
启动项目,打开网页F12查看console控制台信息。
应用代码
   <template>
   <div id="app">
           <img id='img-test' alt="Vue logo" src="./assets/logo.png">
   </div>
   </template>

   <script>
   export default {
       name: 'App',
       beforeCreate(){
           console.log('这是初始化空的vue')
           console.log(this.title)
           console.log(document.querySelector('#img-test'))
       },
       Created(){
           console.loh('初始化data,method等方法')
           console.log(this.title)
           console.log(document.querySelector('#img-test'))
       },
       beforeMount(){
           console.log('页面模板数据已经组装完成,尚未挂载到元素上')
           console.log(this.title)
           console.log(document.querySelector('#img-test'))
       }
       mounted(){
           console.log('页面模板已经挂载完成,可以使用dom元素了')
           console.log(this.title)
           console.log(document.querySelector('#img-test'))
       },
       data(){
           return{
               test:'1111'
           }
       },
       method:{
       }
   }
vue组件
-
vue中什么是组件?
在vue中,组件是可复用的Vue实例,它拥有独一无二的组件名称,它可以扩展HTML元素,以组件名称的方式作为自定义的HTML标签。组件可大大提高了代码的复用率。 -
新建一个组件,并且引用
应用代码
#在src/components文件夹下新加一个GetValue.vue文件内容如下
    <template>
    <div>{{title}}</div>
    </template>

    <script>

    export default {
        name:'GetValue',
        data(){
            return{
                title:'这是GetValue组件'
            }
        }
    }
    </script>
#在src/App.vue中引用GetValue.vue。App.vue中引用代码
    <template>
    <div>
        <GetValue></GetValue>
    </div>
    </template>

    <script>
    import GetValue from './components/GetValue'
    export default {
        name:'App',
        components:{
            GetValue
        }
        data(){
            return{
            }
        }
    }
    </script>
vue中属性绑定、事件绑定及v-model
-
属性绑定(v-bind: 简写:):主要是将data中的数据绑定到对应标签上,实现data中数据->标签数据上的传递。
具体案例代码
#在src/components中新建DataTest.vue内容如下,在App.vue中引入。项目启动后input中数据初始为'这是data中定义的数据' <template> <div> <input v-bind:value="input" /> </div> </template> <script> export default { data(){ return { input:'这是data中定义的数据' } } } </script> -
事件绑定(v-on: 简写@):主要是将methods中的函数绑定到对应标签上,可实现标签中数据->data数据上的传递。
具体案例代码
#在src/components/DataTest.vue继续添加代码如下,项目启动后打开页面,在input中输入的数据会传递到data中input中,然后在h1体现 <template> <div> <h1>显示的是data中input的数据:{{input}}</h1> <input v-bind:value="input" v-on:input='change' /> </div> </template> <script> export default { data(){ return { input:'这是data中定义的数据' } }, methods:{ change(e){ e.target.value } } } </script> -
v-model是属性绑定和函数绑定的语法糖
    #下面两行代码在input标签下是等价的
    <input v-bind:value="input" v-on:input='change' />
    <input v-model="input"  />
取值方式
-
原生方式取值方式主要是通过document上的方法进行取值的。例如
document.querySelector() document.getElementById() document.getElementsByClassName() -
vue中取值方式
vue中普遍的取值两种方式:
-
通过$refs和ref,注册引用信息(主要用来获取子组件信息)
-
data中定义,绑定标签,组件实列中通过this.xx引用
两种方式取值的具体案例代码
#通过getVaule触发在F12 console控制台能发现输出的值是一样的
    <template>
    <div>
        <h1>{{title}}</h1>
        <input ref="input" v-model="input" type="text">
        <button @click="getVaule">获取值</button>
    </div>
    </template>

    <script>

    export default {
        name:'GetValue',
        data(){
            return{
                title:'这是GetValue组件',
                input:'绑定的值'
            }
        },
        methods:{
            getVaule(){
                #$refs取值
                console.log('这是ref获取的值:'+this.$refs.input.value)
                #通过this去访问data中的数据
                console.log('通过this去定义好的值:'+this.input)
            }
        }
    }
    </script>
-
父子组件中的传值
应用场景:子组件需要父组件传递数据进行数据的展示,而子组件功能又要对接受的数据进行处理更新,这个时候就需要父子组件传值。
-
父传子数据
父传子数据代码
#在src/components新建Parent.vue,child.vue两个父子组件 #Parent.vue <template> <div style="background:gold;margin: 20px;"> #1.挂载title <Child :title="title"></Child> </div> </template> <script> import Child from './Child.vue'; export default { name:'Parent', components:{ Child }, data(){ return{ title:'这是父组件传递过去的' } }, methods:{ } } </script> #child.vue <template> #3.使用传递的数据 <h2 style="cursor:pointer">{{title}}</h2> </template> <script> export default { name:'child', #2.接受挂载的数据 props:{ title:{ type:String, } }, data(){ return{} }, } </script> -
子传父数据
子传父数据代码
#在src/components新建Parent.vue,child.vue两个父子组件 #Parent.vue <template> <div style="background:gold;margin: 20px;"> #2.挂载函数 <Child @updateTiTle="updateTiTle"></Child> </div> </template> <script> import Child from './Child.vue'; export default { name:'Parent', components:{ Child }, data(){ return{ title:'这是父组件传递过去的' } }, methods:{ #1.定义一个需要传递的函数,用于回调 updateTiTle(title){ this.title = title } } } </script> #child.vue <template> <h2 @click="hanldTitle" style="cursor:pointer">点击子组件修改数据:{{title}}</h2> </template> <script> export default { name:'child', data(){ return{} }, methods:{ hanldTitle(){ #3.子组件中通过this.$emit 回调Parent.vue中的函数 this.$emit('updateTiTle','这是子组件修改的数据') } } } </script> -
父子传值整合
父子传值整合代码
#在src/components新建Parent.vue,child.vue两个父子组件
#Parent.vue
<template>
    <div style="background:gold;margin: 20px;">
        <div style="cursor:pointer" @click="title='这是父组件传递过去的'">点击重置父组件title:{{title}}</div>
        #1. 绑定title,updateTiTle
        <Child :title="title" @updateTiTle="updateTiTle"></Child>
    </div>
</template>

<script>
import Child from './Child.vue';
export default {
    name:'Parent',
    components:{
        Child
    },
    data(){
        return{
            title:'这是父组件传递过去的'
        }
    },
    methods:{
        #5.修改数据
        updateTiTle(title){
            this.title = title
        }
    }

}
</script>
#child.vue
<template>
                                                            #3.使用title
    <h2 @click="hanldTitle" style="cursor:pointer">点击子组件修改数据:{{title}}</h2>
</template>

<script>
export default {
    name:'child',
    #2.接受title
    props:{
        title:{
            type:String,
        }
    },
    data(){
        return{}
    },
    methods:{
        #4.触发回调
        hanldTitle(){
            this.$emit('updateTiTle','这是子组件修改的数据')
        }
    }
}
</script>